Today it was a gorgeous sunny day here and I decided to test some bleach stenciling for future projects. This turned out to be a lot of fun, incredibly fast and easy, and had some fabulous results. This is something most any fiber crafter can do with common household projects and a little ingenuity.
Tools;
-Fabrics of choice
-cardboard letter stencils
-iron
-2 to 1 bleach solution in spray bottle
-spray baste
-paper towels
-running water and soap

I started with a random selection of fabrics to test. I used 1 fabric that was a hand dyed batik, and several prints of various tone and scale. All fabrics had been pre-washed. I also used a small utility spray bottle and made a solution of about 2 parts bleach 1 part water. I set the nozzle to the spray setting.
I cut the fabrics 6 inches tall and various widths. I chose 6 inches as my stencils are 3 inches tall - I wanted to have a bit of a surrounding area to cut down or sew as I may desire.
 |
| Spraying back of stencils |
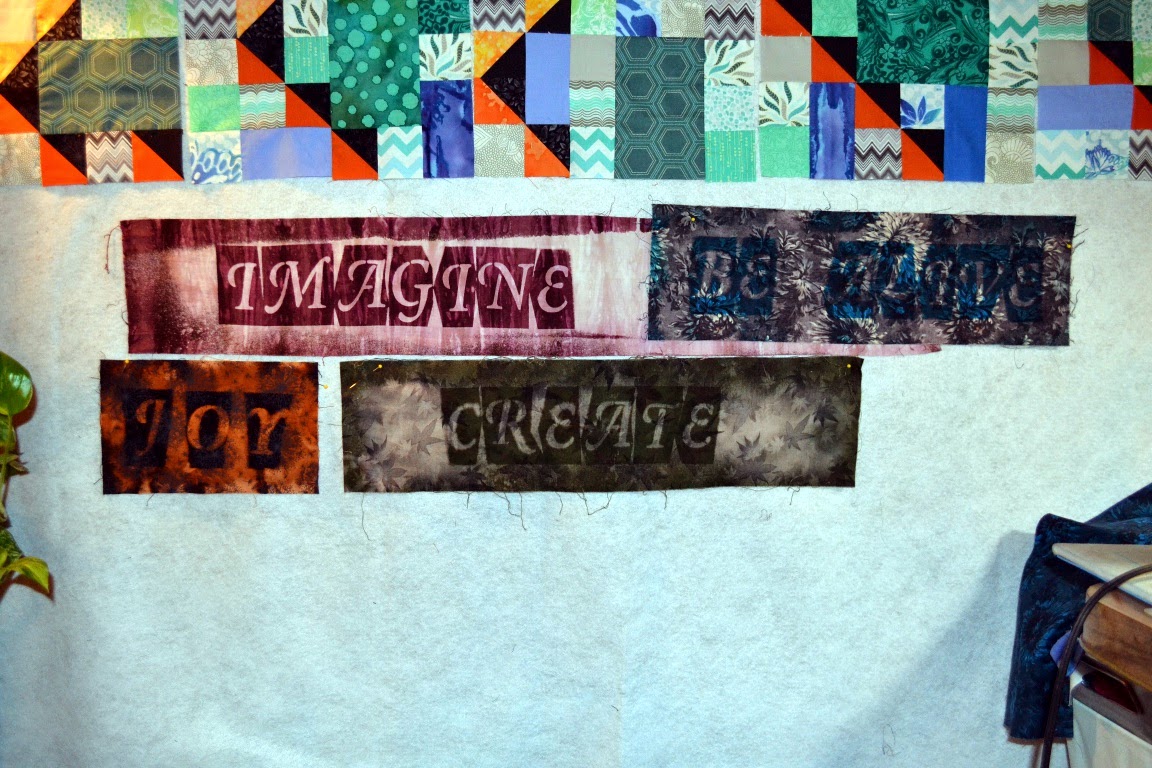
I chose a few simple words to start - imagine, be alive, create, and joy. I sprayed a very light amount of spray baste on the back of my precut cardboard stencils and set them on my fabrics. Then, I set them outside and sprayed them with my bleach solution. I sprayed the stenciled area heavily and randomly around the edges. I personally set them on a bare wood handrail on my back porch and set coffee cups on the corners to keep them from blowing away. Then I let the bleach do its work.
Due in part to my very strong bleach solution it worked very fast. The bleach had the biggest impact on the batik fabric - hand dyed fabric has already been treated to accept color changes and the bleach impacts the dyes used very quickly. The prnted fabrics took a bit more time and had a larger variety of effects based on the prints and the chemicals used in the original print process.
Once I decided a fabric was to the color I wanted it is very simple to deactivate the bleach. I carefully peeled off the stencils - trying to keep them intact for a later use - and then washed them under running warm water. Using a bar of soap, I just quickly scrubbed over the fabric and rinsed clean. I squeezed them as dry as possible then draped them for a while over my shower bar. An air dry and hot iron later and it was ready to go!
A couple of points of interest - bleach is very bad for the skin. I would either use gloves (which I did not) or wash your hands well after every contact and then use lotion (which I did). When washing the bleach out dont be shy about using a nail brush if you like. I used a bar of soap because that was convenient, and it works well at getting things off me. If you prefer you can run the finished pieces thru a wash cycle of the washing machine - just don't add it to a load of darks!
Your cardboard stencils wont last forever. Mine started to peel apart after 3-5 uses. You could make some out of template plastic. Or watch for cardboard ones to go on sale in the office dept of the store. i plan to collect them on sale in various fonts.
Finally - I watched the bleaching process closely. As bleach is corrosive I would not recommend this on delicate or vintage cottons. I would also not bleach for more than an hour or so - bleach can and will 'eat' cotton eventually. You do not want to wind up with a piece of fabric that is brittle and cannot be used in a quilt!
Some fabrics will not accept the bleach at all. Good for color fastness in projects - bad for this project! I believe there are pre-treatments you can do to overcome that, but for the purposes of my project I elected not to look into that. Here you can see a fabric that did not bleach out at all. I was really hoping it would!
 |
| Stencils stuck to the fabric |
 |
| A light print with heavy contrast doesnt do well - you can't even tell there was bleach added |
This is a fun one - black does not bleach to white, it bleaches to a muddy orange! I love that when you use a tone on tone print the painted print will stay and add a whole new dimension to the bleached out sections.
 |
| 5 minutes |
 |
| 10 minutes |
 |
| 15 minutes |
 |
| Washed and ironed - love how the orange kind of glows and the printed floral stayed on |
I was unsure how the dark green would do, it seemed to take forever to bleach out. However, once I say it going i loved how the leaf print stayed a grey item thru the fabric.
 |
| 15 minutes |
 |
| 20 minutes |
 |
| 25 minutes |
 |
| Ready to use! |
I love this rich blue fabric. Its fascinating how it bleached out to a grey. the large print with contrast muddied up the words a bit - something to keep in mind.
 |
| 10 minutes |
 |
| 15 minutes |
 |
| 20 minutes |
 |
| Ironed and completed. A large print like this will show - make sure thats what you want |
Now I have several pieces I will have to put into projects - and lots of ideas for more! Thinking about a project using a favorite word or phrase in several languages. Adding words to a few ongoing projects. The possibilities!
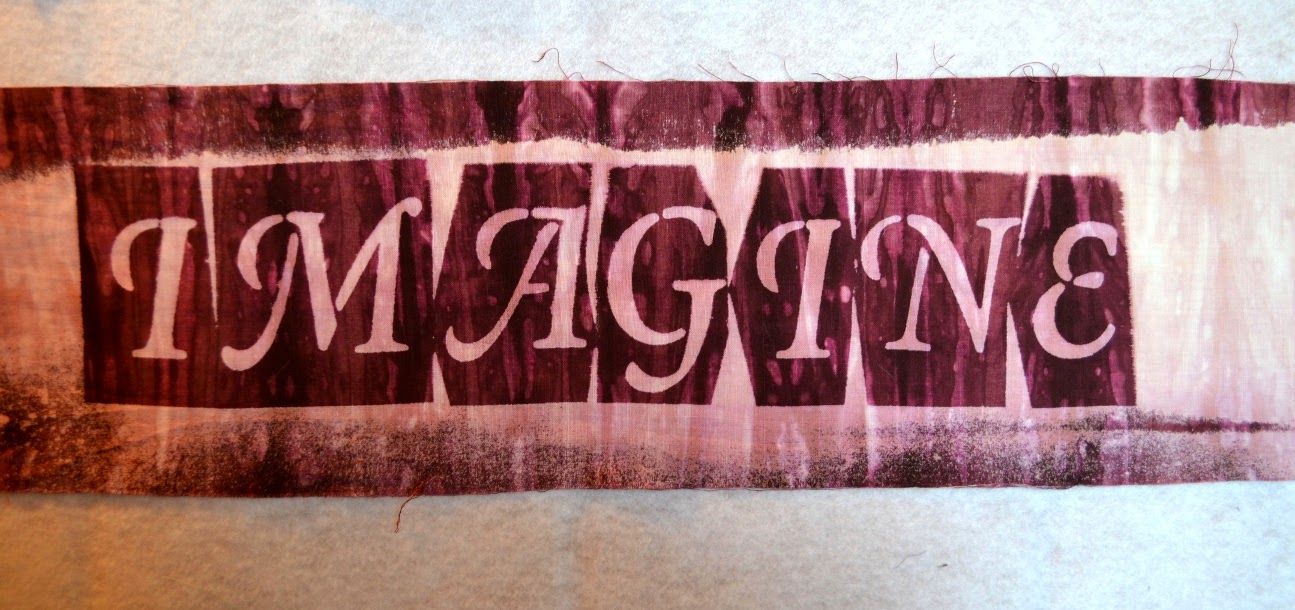 |
| This is the hand dyed fabric - a bright burgundy. I love how this came out |
 |
| So much possibility! |

Comments
Post a Comment
Thank you for visiting! I love to hear from you, please share your thoughts!